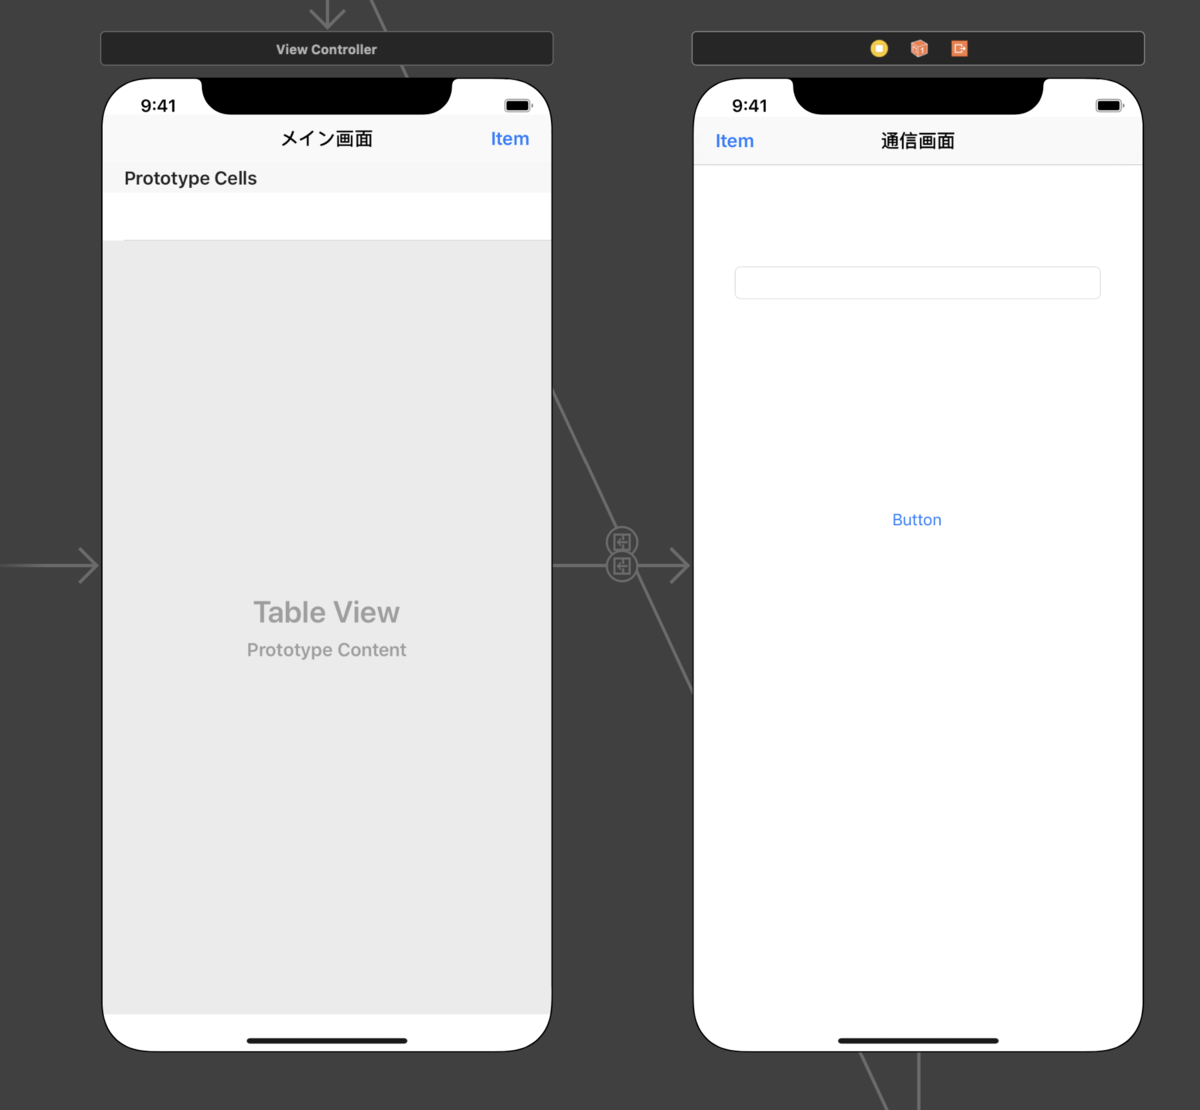
【iphoneアプリ開発_初心者必見】ToDoリストを作ってみよう (TableViewの基礎・基本)
最終更新日:2020年08月14日

家に引きこもっている「ゴルトン社長」です。(twitter : @GoRuton_1stStep)
人気の記事!
人生を変えたい人に向けて「はじめの一歩」を踏み出したい人にオススメ!
www.goruton.com www.goruton.com www.goruton.com www.goruton.com
1) ToDoリストの基礎・基本

//  ViewController.swift
import UIKit

//classの継承を追加
class ViewController: UIViewController,UITableViewDelegate,UITableViewDataSource {

    //UITableView、numberOfRowsInSectionの追加(表示するcell数を決める)
    func tableView(_ tableView: UITableView, numberOfRowsInSection section: Int) -> Int {
        //戻り値の設定(表示するcell数)
        return TodoKobetsunonakami.count
    }

    //UITableView、cellForRowAtの追加(表示するcellの中身を決める)
    func tableView(_ tableView: UITableView, cellForRowAt indexPath: IndexPath) -> UITableViewCell {
        //変数を作る
        let TodoCell : UITableViewCell = tableView.dequeueReusableCell(withIdentifier: "TodoCell", for: indexPath)
        //変数の中身を作る
        TodoCell.textLabel!.text = TodoKobetsunonakami[indexPath.row]
        //戻り値の設定(表示する中身)
        return TodoCell
    }


    //最初からあるコード
    override func viewDidLoad() {
        super.viewDidLoad()
        //追加画面で入力した内容を取得する
        if UserDefaults.standard.object(forKey: "TodoList") != nil {
            TodoKobetsunonakami = UserDefaults.standard.object(forKey: "TodoList") as! [String]
        }
    }

    //最初からあるコード
    override func didReceiveMemoryWarning() {
        super.didReceiveMemoryWarning()
    }
}
//AddController.swift
import UIKit

//変数の設置
var TodoKobetsunonakami = [String]()

class AddController: UIViewController {

    //テキストフィールドの設定
    @IBOutlet weak var TodoTextField: UITextField!

    //追加ボタンの設定
    @IBAction func TodoAddButten(_ sender: Any) {
        //変数に入力内容を入れる
        TodoKobetsunonakami.append(TodoTextField.text!)
        //追加ボタンを押したらフィールドを空にする
        TodoTextField.text = ""
        //変数の中身をUDに追加
        UserDefaults.standard.set( TodoKobetsunonakami, forKey: "TodoList" )
    }

    //最初からあるコード
    override func viewDidLoad() {
        super.viewDidLoad()
    }

    //最初からあるコード
    override func didReceiveMemoryWarning() {
        super.didReceiveMemoryWarning()
    }
}
2) ToDoリストのSection設定と折りたたみアニメーション
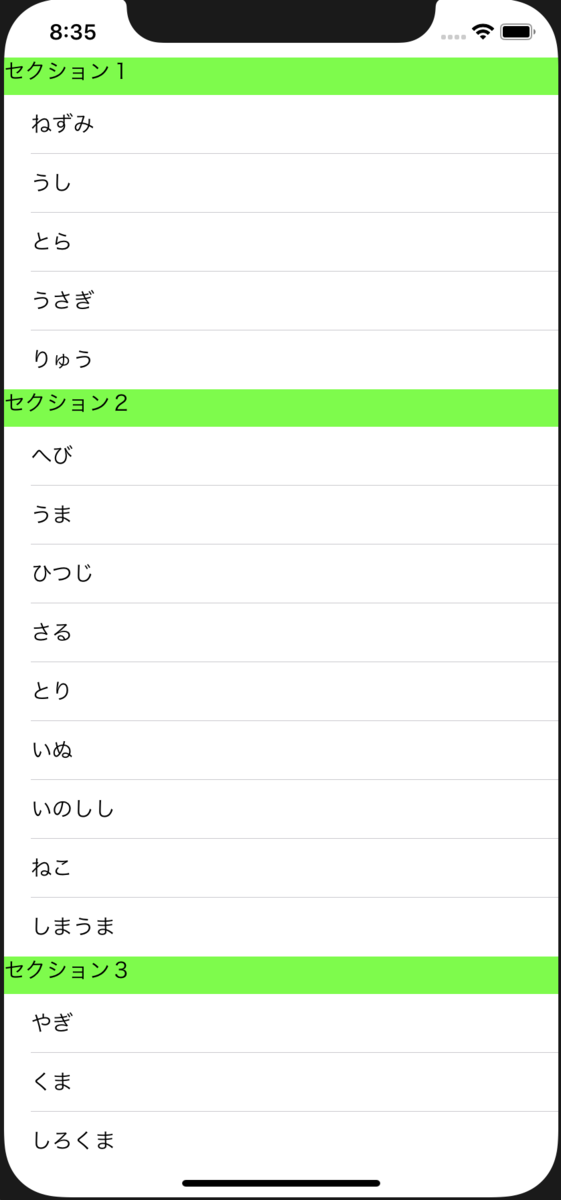
- テーブルビューの表示
- 複数セクションでの表示
- セクション単位のテーブルの折りたたみ
- セルをスワイプしての削除
- セルをタップして値を表示

import UIKit

class ViewController: UIViewController,  UITableViewDelegate,UITableViewDataSource {

    // テーブルビュー
    @IBOutlet weak var myTableView: UITableView!

    // 折りたたみフラグ
    var foldingFlg1 = false
    var foldingFlg2 = false
    var foldingFlg3 = false

    // 配列
    var items1: NSMutableArray = ["ねずみ", "うし", "とら", "うさぎ", "りゅう"]
    var items2: NSMutableArray = ["へび", "うま","ひつじ","さる","とり","いぬ","いのしし","ねこ","しまうま"]
    var items3: NSMutableArray = ["やぎ","くま","しろくま","こぶら","ごりら","ぶた","ぞう","おおかみ"]
    var section1: Dictionary = [String:NSMutableArray]()
    var section2: Dictionary = [String:NSMutableArray]()
    var section3: Dictionary = [String:NSMutableArray]()
    var sections: Array = [Dictionary<String,NSMutableArray>]()

    // MARK: メソッド
    override func viewDidLoad() {
        super.viewDidLoad()

        // テーブルビューの背景色を設定する。
        let bgColor = UIColor.green.withAlphaComponent(0.1)
        self.myTableView.backgroundColor = bgColor
        self.myTableView.backgroundView?.backgroundColor = bgColor

        // セクションのタイトルとデータの配列を設定する。
        section1 = ["セクション1":items1]
        section2 = ["セクション2":items2]
        section3 = ["セクション3":items3]

        // セクションを配列に設定する。
        sections.append(section1)
        sections.append(section2)
        sections.append(section3)

        // デリゲートを設定する。
        myTableView.delegate = self
        myTableView.dataSource = self
    }

    override func didReceiveMemoryWarning() {
        super.didReceiveMemoryWarning()
        // Dispose of any resources that can be recreated.
    }

    // MARK: テーブルビューのデリゲードメソッド
    // UIViewを返す。
    func tableView(_ tableView: UITableView, viewForHeaderInSection section: Int) -> UIView? {

        // セクションのヘッダとなるビューを作成する。
        let myView: UIView = UIView()
        let label:UILabel = UILabel()
        for (key) in sections[section].keys
        {
            label.text = key
        }
        label.sizeToFit()
        label.textColor = UIColor.black
        myView.addSubview(label)
        myView.backgroundColor = UIColor.green

        // セクションのビューに対応する番号を設定する。
        myView.tag = section
        // セクションのビューにタップジェスチャーを設定する。
        myView.addGestureRecognizer(UITapGestureRecognizer(target: self, action: #selector(self.tapHeader(gestureRecognizer:))))

        return myView
    }

    // セクションの数を返す。
    func numberOfSections(in tableView: UITableView) -> Int {
        return self.sections.count
    }

    // セルの数を返す。
    func tableView(_ tableView: UITableView, numberOfRowsInSection section: Int) -> Int {
        // テーブルビューのセル数の設定する。
        switch section {
        case 0:
            return foldingFlg1 ? 0 : self.items1.count
        case 1:
            return foldingFlg2 ? 0 : self.items2.count
        case 2:
            return foldingFlg3 ? 0 : self.items3.count
        default:
            return 0
        }
    }

    // セルを返す。
    func tableView(_ tableView: UITableView, cellForRowAt indexPath: IndexPath) -> UITableViewCell {
        // セルにテキストを出力する。
        let cell = tableView.dequeueReusableCell(withIdentifier:  "cell", for:indexPath as IndexPath)
        for (value) in sections[indexPath.section].values
        {
            cell.textLabel?.text = value[indexPath.row] as? String
        }

        return cell
    }

    // テーブルビューをスワイプしてデータを削除する。
    func tableView(_ tableView: UITableView, editActionsForRowAt indexPath: IndexPath) -> [UITableViewRowAction]? {
        let deleteButton: UITableViewRowAction = UITableViewRowAction(style: .normal, title: "削除") { (action, index) -> Void in
            for (value) in self.sections[indexPath.section].values
            {
                value.removeObject(at: indexPath.row)
            }

            tableView.deleteRows(at: [indexPath], with: .fade)
        }
        deleteButton.backgroundColor = UIColor.red

        return [deleteButton]
    }

    // 選択したセルの値を出力する。
    func tableView(_ table: UITableView,didSelectRowAt indexPath: IndexPath) {
        // タップしたセルのテキストを取得する。
        var selectText = ""
        for (value) in self.sections[indexPath.section].values
        {
            selectText = value[indexPath.row] as! String
        }

        // アラートを生成する。
        let alert: UIAlertController = UIAlertController(title: selectText, message: "\(selectText)を選択しました。", preferredStyle:  UIAlertController.Style.alert)
        let defaultAction: UIAlertAction = UIAlertAction(title: "OK", style: UIAlertAction.Style.default, handler:nil)
        alert.addAction(defaultAction)

        // アラートを表示する。
        present(alert, animated: true, completion: nil)
    }

    // MARK: アクション
    @objc func tapHeader(gestureRecognizer: UITapGestureRecognizer) {
        // タップされたセクションを取得する。
        guard let section = gestureRecognizer.view?.tag as Int? else {
            return
        }

        // フラグを設定する。
        switch section {
        case 0:
            foldingFlg1 = foldingFlg1 ? false : true
        case 1:
            foldingFlg2 = foldingFlg2 ? false : true
        case 2:
            foldingFlg3 = foldingFlg3 ? false : true
        default:
            break
        }

        // タップされたセクションを再読込する。
        myTableView.reloadSections(NSIndexSet(index: section) as IndexSet, with: .none)
    }

}

- 上記のようにCellを設定してください
- テーブルの表示のためには、UITableViewDelegate, UITableViewDataSourceの設定が必要です
5) その他
- UITableView をスクロールさせない
tableView.scrollEnabled = false
参考リンク先
To Do アプリ
TableView
- 【Swift】tableViewとtableViewCellの使い方とソースコード事例
- 【Swift4】一つのViewに複数のTableViewを配置する
- UITableView
- TableViewの基礎
- 【Swift4】UITableViewのミニマムサンプル【iOS】
- Swift3 - UITableViewでセル追加
- UITableViewに行を追加する
- 【Swift入門】UITableViewの使い方をわかりやすく解説! | 侍エンジニア塾ブログ(Samurai Blog) - プログラミング入門者向けサイト
- 【iOS】ちょっと待って!その画面UITableViewで作る必要ないかも - ペンギン村 Tech Blog
- UITableView をストーリボードで作る
- 【Swift】複数の section がある tableView で二次元配列を使う。 - Qiita
- Swift TableView Section ごとに表示内容を分ける - happy_teeth's 忘備録
TableViewのアニメーション
- [Swift] CellをTableViewにアニメーション付きで追加する
- Xcode - UITableViewでチェックリストを作成する|teratail
- アコーディオンメニューを実装する - Qiita
重要な参考リンク先
- SwiftでTableViewを使ってみよう
- UITableViewで表を表示する方法(その1) – Xcodeの使い方8
- UITableViewでチェックリストを作成する
- 【Swift】複数のsectionがあるtableViewで二次元配列を使う。
- [iPhone] UITableView Section の設定
- テーブルビューをセクションごとに開閉する
- 【iPhoneアプリ・Swift】セクション分けしたテーブルビューを表示してみよう!その1
最後に!!

最後までご覧いただき、本当にありがとうございます!!
最近は、たくさんの読者さんから「コメント」や「メッセージ」が届くようになりました!!
皆さんと会話できて嬉しいですし、コメントで毎日励まされています。
ありがとうございます!
これからも、ゴルトン社長は「毎日」ブログを更新しています! www.goruton.com www.goruton.com www.goruton.com www.goruton.com www.goruton.com
皆さんから人気がある記事
www.goruton.com www.goruton.com www.goruton.com www.goruton.com www.goruton.com
まとめ記事
www.goruton.com www.goruton.com www.goruton.com www.goruton.com www.goruton.com www.goruton.com www.goruton.com